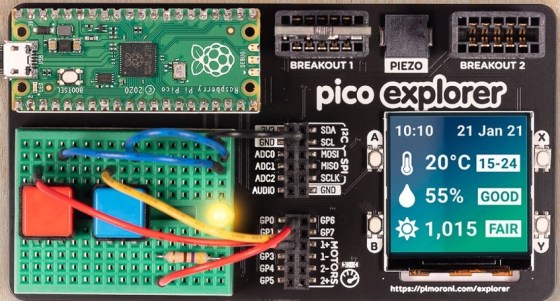
In a previous article we looked at the Pico Explorer Base and in this article we look at using circuitpython on the attached display.
The 240 x 240 display fitted which is controlled by a ST7789 chip using SPI. the pins used are
tft_cs = board.GP17
tft_dc = board.GP16
spi_mosi = board.GP19
spi_clk = board.GP18
Code
I used Thonny for development and I am using Circuitpython
You will need to download and install the latest circuitpython from the citrcuitpython download site
The following is based on a library which you can download the zip bundle from https://github.com/adafruit/Adafruit_CircuitPython_Bundle/releases
Before you continue make sure your board’s lib folder or root filesystem has the adafruit_st7789.mpy , and adafruit_display_text files and folders copied over on the RP2040 – https://circuitpython.org/libraries
There is a code example for the display and its called st7789_240x240_simpletest_Pimoroni_Pico_Explorer.py – this is the code below
import board
import busio
import terminalio
import displayio
from adafruit_display_text import label
from adafruit_st7789 import ST7789

# Release any resources currently in use for the displays
displayio.release_displays()

tft_cs = board.GP17
tft_dc = board.GP16
spi_mosi = board.GP19
spi_clk = board.GP18
spi = busio.SPI(spi_clk, spi_mosi)

display_bus = displayio.FourWire(spi, command=tft_dc, chip_select=tft_cs)

display = ST7789(display_bus, width=240, height=240, rowstart=80, rotation=180)

# Make the display context
splash = displayio.Group()
display.show(splash)

color_bitmap = displayio.Bitmap(240, 240, 1)
color_palette = displayio.Palette(1)
color_palette[0] = 0x00FF00  # Bright Green

bg_sprite = displayio.TileGrid(color_bitmap, pixel_shader=color_palette, x=0, y=0)
splash.append(bg_sprite)

# Draw a smaller inner rectangle
inner_bitmap = displayio.Bitmap(200, 200, 1)
inner_palette = displayio.Palette(1)
inner_palette[0] = 0xAA0088  # Purple
inner_sprite = displayio.TileGrid(inner_bitmap, pixel_shader=inner_palette, x=20, y=20)
splash.append(inner_sprite)

# Draw a label
text_group = displayio.Group(scale=2, x=50, y=120)
text = "Hello World!"
text_area = label.Label(terminalio.FONT, text=text, color=0xFFFF00)
text_group.append(text_area)  # Subgroup for text scaling
splash.append(text_group)

while True:
    pass
Run this in Thonny and on the display you should see 2 boxes and Hello world in the inside one.
We can now use the display with circuitpython and maybe create some interesting graphical outputs for sensors like the image above of the explorer