In this article we connect a SHT40 Temperature & Humidity Sensor to a Raspberry Pi Pico running Circuitpython
Sensor Information
This is the next generation of SHT sensor, in the past we have had examples for sensors such as the SHt31 and now we move on to the 4th generation of these
First lets look at some information about the sensor from the manufacturer
The SHT40 builds on a completely new and optimized CMOSens® chip that offers reduced power consumption and improved accuracy specifications. With the extended supply voltage range from 1.08 V to 3.6 V, it’s the perfect fit for mobile and battery-driven applications.
| Size | 1.5 x 1.5 x 0.5 mm3 |
| Output | I²C |
| Supply voltage range | 1.08 to 3.6 V |
| Energy consumption | 0.4µA (at meas. rate 1 Hz) |
| RH operating range | 0 – 100% RH |
| T operating range | -40 to +125°C (-40 to +257°F) |
| RH response time | 6 sec (tau63%) |
Here is the sensor I purchased from the good folks at Adafruit (via Pimoroni in the UK)
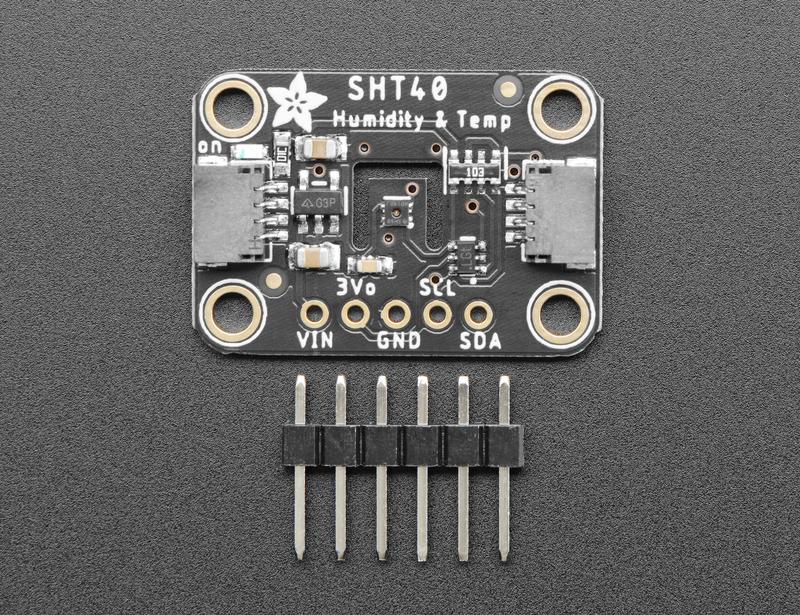
adafruit SHT40
Unlike earlier SHT sensors, this sensor has a true I2C interface for easy interfacing with only two wires (plus power and ground!).
Thanks to the voltage regulator and level shifting circuitry that Adafruit have included on the breakout it is also 3V or 5V compliant, so you can plug it into the 5v of your Arduino without worrying about blowing the thing up – which is always handy.
Parts Required
The sensor you can pick up in the $6 price range – you can connect to the sensor using a standard header the classic dupont style jumper wire.
I used a Qwiic cable – since a few sensors seem to use these but this is optional
| Name | Link |
| Pico | Raspberry Pi Pico Development Board |
| SHT40 | https://www.adafruit.com/product/4885 |
| Connecting cables | Aliexpress product link |
Schematic/Connection
I used the Adafruit VCNL4040 sensor and in this case used the Stemma connection
For the STEMMA QT cables, it uses the Qwiic convention:
Black for GND
Red for V+
Blue for SDA
Yellow for SCL
So color coded for ease of use, this layout shows a connection to the module
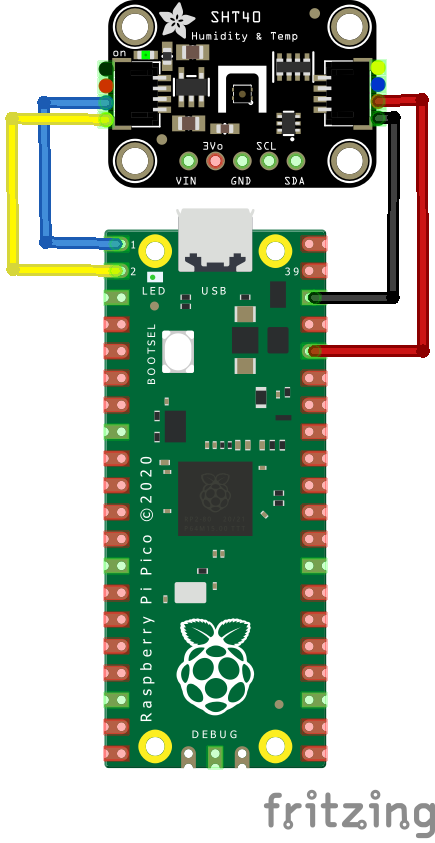
rp2040 and sht40
Code Example
I used Thonny for development
The following is based on a library , I copied the adafruit_sht4x.mpy library for this device to the lib folder on my Feather M0 Express – https://circuitpython.org/libraries
This is the basic example which comes with the library
[codesyntax lang=”python”]
import time
import board
import adafruit_sht4x
import busio

# Create sensor object, communicating over the board's default I2C bus
#i2c = board.I2C()  # uses board.SCL and board.SDA
i2c = busio.I2C(scl=board.GP1, sda=board.GP0)
sht = adafruit_sht4x.SHT4x(i2c)
print("Found SHT4x with serial number", hex(sht.serial_number))

sht.mode = adafruit_sht4x.Mode.NOHEAT_HIGHPRECISION
# Can also set the mode to enable heater
# sht.mode = adafruit_sht4x.Mode.LOWHEAT_100MS
print("Current mode is: ", adafruit_sht4x.Mode.string[sht.mode])

while True:
    temperature, relative_humidity = sht.measurements
    print("Temperature: %0.1f C" % temperature)
    print("Humidity: %0.1f %%" % relative_humidity)
    print("")
    time.sleep(1)
[/codesyntax]
Output
Here is what I saw in Thonny REPL window
Temperature: 23.1 C
Humidity: 62.9 %
Temperature: 23.5 C
Humidity: 62.2 %
Temperature: 23.7 C
Humidity: 61.5 %
Temperature: 23.9 C
Humidity: 61.0 %
Links
https://learn.adafruit.com/introducing-adafruit-stemma-qt/technical-specs
https://www.sensirion.com/en/download-center/humidity-sensors/humidity-sensor-sht4x/